Caulk Like a Pro
Here at LeafFilter, we aim to make gutter maintenance hassle-free. Our gutter professionals clean, inspect, and seal your gutters before installing LeafFilter so that you’ll worry less about cleaning out clogged gutters (or caulking them!) over and over.
But, if you’re tackling a project that requires a reliable seal – like tiling your bathroom, or putting in new kitchen countertops – we’ve got you covered!
Learn how to caulk with these expert tips!
1. Select the right type of caulk for your project.
Looking at all the product choices at your local home improvement store may feel overwhelming. It’s important to choose the right type of product for your project to save you the hassle of having to redo it down the road.
You can choose between latex, acrylic-latex blend, silicon, or tri-polymer products. They all have their pros and cons, but based on cost-effectiveness and qualities, you’re safest with an acrylic-latex formula product. If you’re working on an outdoor project, and don’t mind spending a little extra, you can go with tri-polymer. But, stay away from pure latex products. They don’t tend to hold up as well over time.
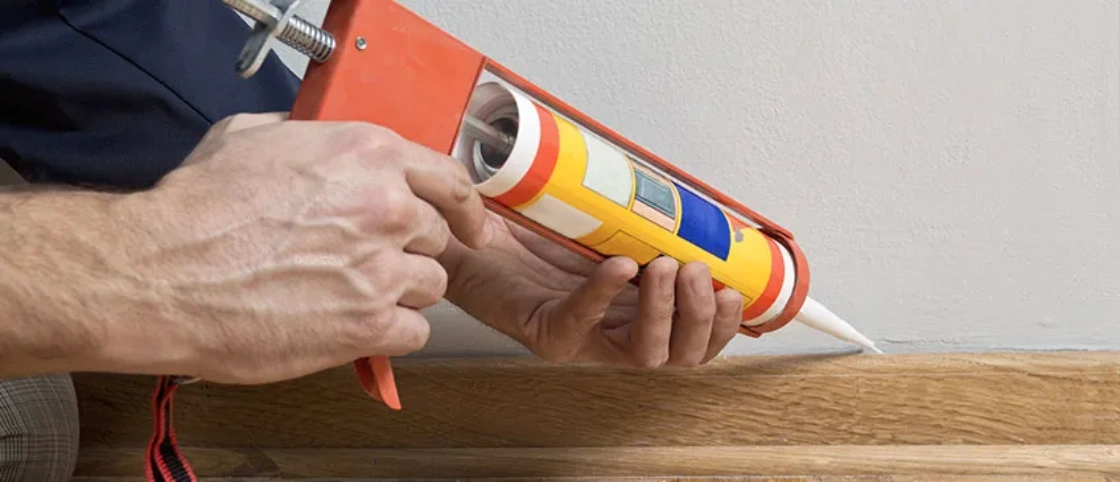
2. To use a caulk gun, or not? It depends!
If you’re working on a budget, and you have a steady hand, you can simply use a squeeze tube for your project. However, if you’re doing a particularly large job, you may want to avoid this option or risk hand cramps galore.
Caulk guns give you a steady stream without so much hand cramping. However, we don’t recommend using a cheap ($2-10) product, as these tend to drip and have an unsteady stream.
Instead, spring for a higher-end ($15-20) caulk gun. They’re worth every penny.
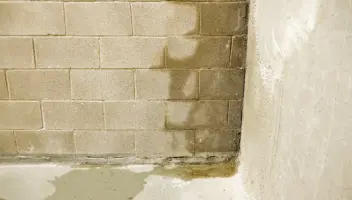
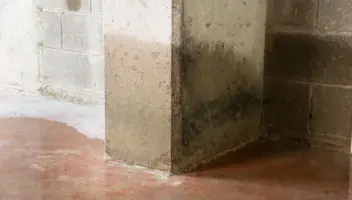
2. Preparing an area for caulking is a must.
If the surface you’re working with is grimy, make sure to clean it before you begin sealing. If it’s porous, use a small bristled brush (like a toothbrush) to clean out all the nooks and crannies. If water isn’t cutting it, you can use cleaning agents to help. Make sure to rinse the surface (and let it dry!) before you begin so that the chemicals in the cleaning product don’t react with or repel the caulk.
If the area has already been sealed, remove the old seal before you begin (unless it’s the tri-polymer kind, in which case it will stick to itself). You can use a screwdriver or putty knife to get the leverage you need to pull out the old rope of caulk. If a seal is stubborn, get a chemical dissolver to loosen the grip.
3. Not sure how to caulk? It’s easier than you might think!
- Cut the tip of the tube to be about ⅔ the size of the gap you’re working with to prevent over-caulking
- If you don’t have a steady hand, apply painter’s tape to the edges of the area for a straight line
- Use filler rope for gaps bigger than ½” before sealing (it’s more cost-effective than using gobs of sealant, and will create a longer-lasting seal)
- Hold the tube at a 45° angle
- Push the bead ahead of the nozzle so that you can see the stream as it comes out of the tube (You can gauge how much pressure to use on the trigger and how fast to move)
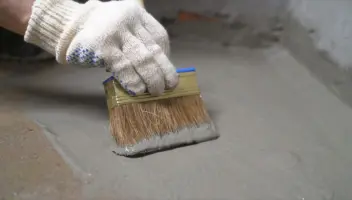
- Tool the joint every few feet, before it dries (it not only helps it look good but improves the seal)
- Don’t buy a smoothing tool. Just use your finger, dipped in water, to evenly smooth your seal before it dries (Skeptical? Even the professionals tend to use their fingers when tooling the caulk)
- Stick a flat pin or a flathead nail in the tip of the nozzle in order to cap it off when you take breaks so that it doesn’t dry out.
Have other questions about caulking? Let us know in the comments!