How to Install Gutter Guards
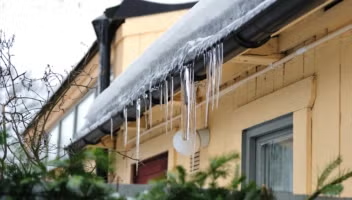
Gutter guards — also known as leaf guards — are fitted over your gutters to help prevent leaves, twigs, and debris from causing clogs, so water can flow freely throughout your gutter system and move away from your home. Here’s why clogged gutters are such a big deal: they cause water to spill over the sides, leading to rotted fascia boards, basement flooding, and foundation cracks.
Learning how to install gutter guards can save you from dealing with leaf buildup and help protect your home from the kind of damage that happens when gutters get clogged. Quality protection systems, like LeafFilter, deliver clog-free gutters, guaranteed.
If you’re tired of dealing with clogged gutters or leaf buildups, or you’re considering a DIY gutter guard installation, we’ll walk you through what to expect and help you decide whether tackling it yourself or hiring professionals is the right choice for your home.
In this article, we’ll discuss:
- What Are Gutter Guards?
- Types of Gutter Guards
- Safety and Tools Checklist
- Step-by-Step Gutter Guard Installation Guide
- Mistakes to Avoid When Installing Gutter Guards
- DIY Gutter Guard Install vs Hiring a Pro
- Benefits of Installing Gutter Guards
- Help Protect Your Home with Clog-Free Gutters
- Frequently Asked Questions
What Are Gutter Guards?
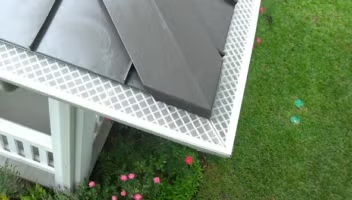
Gutter guards are protective barriers designed to sit on top of gutters and filter out debris. They come in various styles ranging from simple mesh screens to advanced micromesh designs. Each type of gutter guard is engineered to handle varying debris and rainfall conditions. The right system acts as a shield for your gutters, extends their lifespan, and helps prevent overflow issues that can lead to expensive repairs.
Types of Gutter Guards
Selecting the right type of gutter guard depends on factors such as your local climate, rainfall patterns, and budget. If you frequently experience heavy rainstorms, your needs will differ from those of households in arid climates.
The main options include:
- Brush gutter guards
- Foam gutter guards
- Screen gutter guards
- Mesh gutter guards
- Micromesh gutter guards
- Surface tension gutter guards
Read our full guide on the types of gutter guards to understand how choosing the right type can impact your home.
Attention homeowners! 🏡 Did you know that LeafFilter offers FREE estimates for your gutter protection needs? Say goodbye to clogs and hello to peace of mind with LeafFilter!✅ To learn more and get started today, visit https://t.co/6tWbQ0wMvX #ClogFree #FreeEstimate #LeafFilter pic.twitter.com/9JOuBzi7Mp
— LeafFilter Gutter Protection (@LeafFilter) July 18, 2023
Safety and Tools Checklist
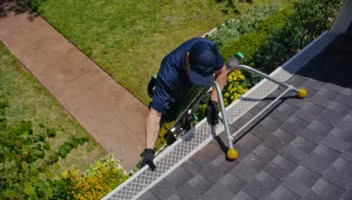
Before starting a gutter guard installation, always prioritize your safety. Use a sturdy extension ladder with a stabilizer bar to prevent it from damaging your gutters or slipping. Position the ladder on level ground and maintain three points of contact at all times when climbing.
Wear safety glasses to protect your eyes from debris and metal shavings, heavy-duty work gloves to prevent cuts from sharp gutter edges, and non-slip footwear with good traction. Never work alone on a ladder, avoid working in wet or windy conditions, and consider using a ladder standoff to keep your weight away from the gutters, which can be dented or damaged.
Tools and Materials You’ll Need for Gutter Guard Installation
- Extension ladder (tall enough to reach your roof safely with at least 3 feet extending above the gutter line)
- Ladder stabilizer or standoff bar
- Safety glasses
- Heavy-duty work gloves
- Tape measure (25-foot minimum)
- Aviation tin snips or metal shears
- Cordless drill with nut driver attachment
- Self-tapping screws (stainless steel, #8 x ½-inch)
- Silicone sealant or gutter sealant
- Pry bar or flathead screwdriver (for removing old guards or lifting shingle edges)
- Chalk line or marker
- Work belt or bucket for holding hardware
Before You Start: Prep Checklist
Preparation is the key to a gutter guard installation that lasts. Take the time to thoroughly inspect and prepare your gutter system before you install the gutter guards of your choice. This helps ensure your guards sit flush, drain properly, protect your home, and prevent damage.
Clean and Flush Gutters
Remove any leaves, twigs, or other debris from the gutters. Use a hose to flush out gutters, checking that downspouts flow normally before installation.
Inspect Gutter Slope and Hangers
Confirm that your gutters are properly sloped at approximately ¼ inch per 10 feet toward the downspouts to ensure water drains correctly. Run water through the system with a hose and watch for standing pools, which could be a sign of improper pitch or sagging sections.
Inspect all gutter hangers, and make sure they’re spaced no more than 24 inches apart and securely fastened. Loose or missing hangers cause gutters to sag and pull away from the fascia board.
Check seams for separation or leaks by looking for water stains or gaps, and reseal any problem areas with gutter sealant before proceeding. Tighten loose hangers with a screwdriver or drill, and replace any that are bent or damaged.
Installing gutter guards over a system that’s compromised or damaged structurally can add weight and lead to further damage, leaks, or complete gutter detachment during a heavy rain or snowstorm.
Follow Ladder and Roof Safety Guidelines
Position your ladder at the proper 4:1 ratio (for every 4 feet of height, the base should be 1 foot away from the wall) and always use a ladder stabilizer to distribute weight and prevent gutter damage.
Never lean directly on gutters for support — they’re not designed to hold your body weight and can easily bend or detach from the fascia. Maintain three points of contact at all times. Move the ladder instead of overreaching, and have someone spot you from the ground whenever possible.
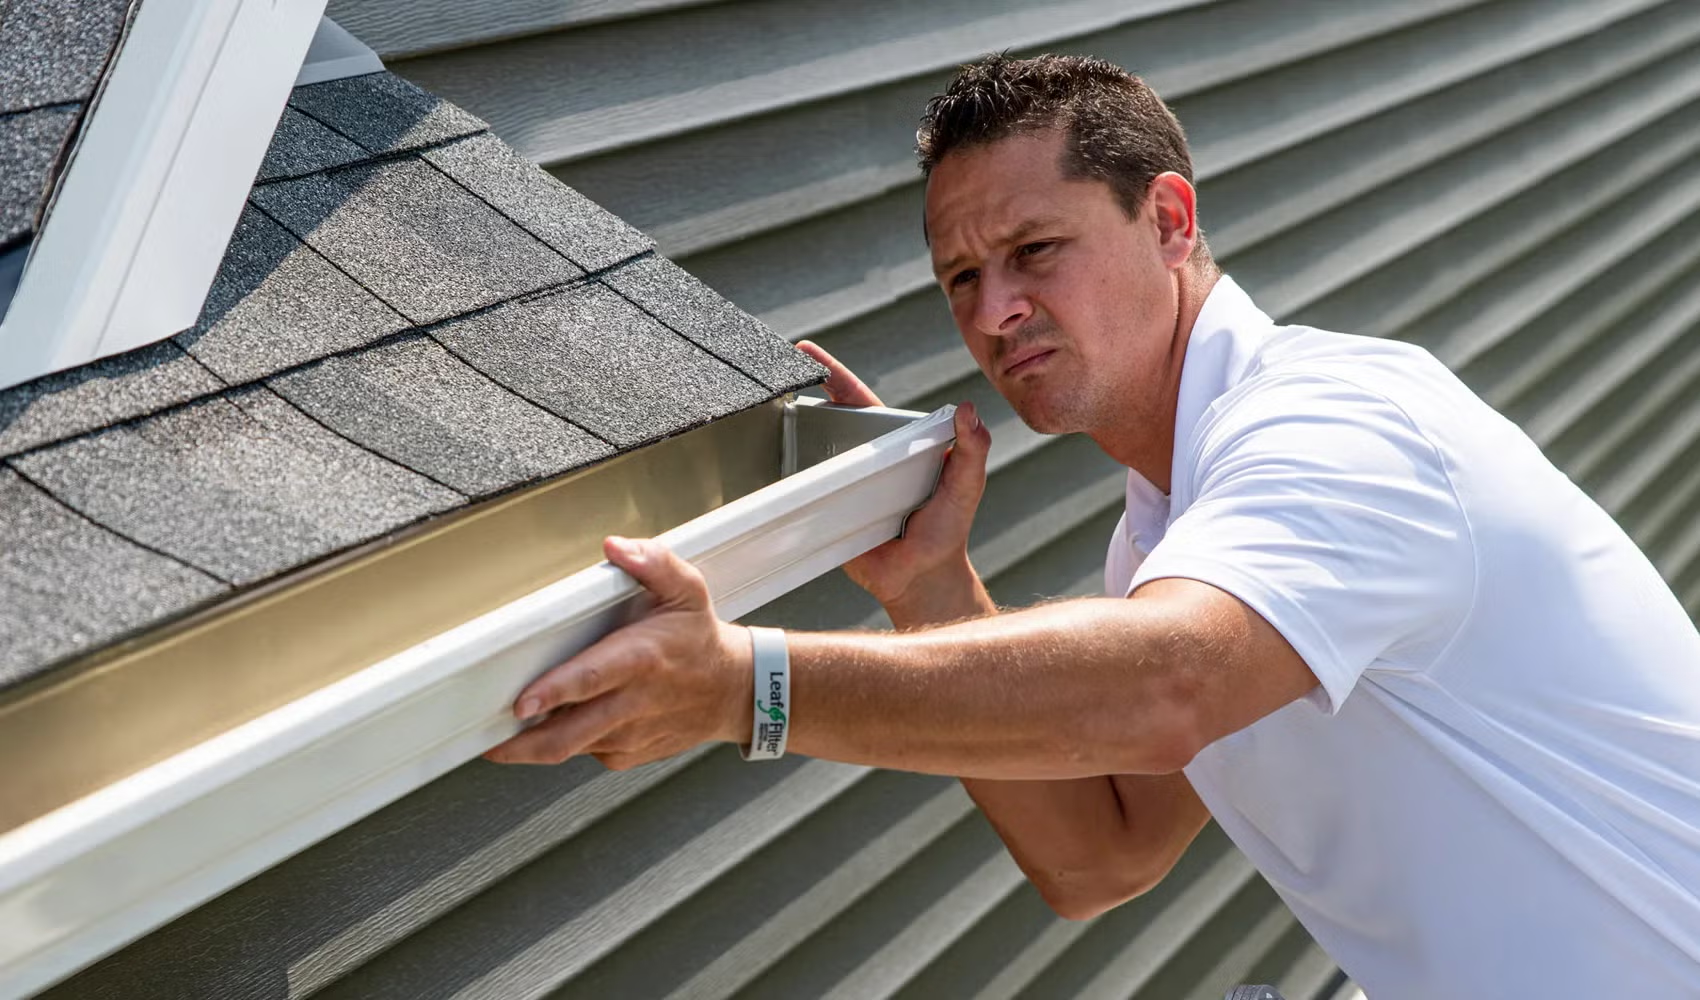
Step-by-Step Gutter Guard Installation Guide
Step 1: Measure and Evaluate Your Gutters
Measure the total linear feet of gutters you need to cover, section by section. Identify your gutter style, whether it’s K-style with a decorative front or half-round U-shaped, since guards are designed to fit specific profiles.
Measure the width of your gutter opening at the top, which is usually 4 to 6 inches for residential systems. Check that your gutter guard system is compatible with your gutter dimensions.
Walk the perimeter and note any inside or outside corners, end caps, and downspout locations where you’ll need to cut guards to fit. We recommend adding 10% to your total measurement to account for cuts, mistakes, and overlaps.
Step 2: Prepare and Clean Out Gutters
Remove all debris from inside your gutters and flush the system thoroughly with a hose to clear downspouts. Check every gutter hanger to ensure it’s tight and properly spaced. Look for loose screws, sagging sections, or separating seams that need attention before installation.
Tighten any loose fasteners and reseal leaking seams with gutter sealant, allowing it to cure, per manufacturer instructions. Wipe down the gutter lip and outer edge with a rag to remove dirt and oxidation where guards will make contact.
Step 3: Install Your Specific Gutter Guard Type
Your method of Installation will depend on the type of guard you’re using.
Snap-in screen guards hook onto the front gutter lip and slide under the first row of shingles (only if your manufacturer specifically allows this, as lifting shingles can void roof warranties). Most DIY micro-mesh guard systems rest on top of the gutter with the back edge tucked under shingles and the front edge secured to the gutter lip with clips.
Before using screws, check with your manufacturer, as holes can damage roof shingles and void warranties.
Securing and Aligning the Guards
Secure the front edge to the gutter lip using the provided clips, screws, or snap-fit system.
Space fasteners every 12 to 18 inches to prevent warping or lifting during heavy rain or wind. Self-tapping stainless steel screws work best for permanent installation. Drive them through the pre-drilled holes in the guard and into the outer lip of the gutter, being careful not to overtighten and dent the material.
The guard guard should sit flat and firm against both the roof and gutter without gaps or buckling. Overlap consecutive sections by at least 1 inch to prevent debris entry, and secure the overlap point with an additional fastener.
Check alignment frequently as you work to ensure the guards maintain a consistent angle and position along the entire run.
Trimming and Finishing Edges
Use aviation tin snips to cut gutter guards for inside corners, outside corners, end caps, and downspout openings. Measure twice and cut once, leaving a small gap (about ⅛ inch) at corners to allow for thermal expansion.
For downspouts, trace the opening onto the guard and cut slightly inside your line, then test-fit and trim as needed for a snug fit around the outlet.
Valley areas, where two roof sections meet, require special attention since they channel the most water. Some systems include valley diverters or require you to notch the guards to prevent overflow. Cut gutter guards to follow the valley angle and ensure water is directed into the gutter rather than shooting over it.
Secure all cut edges with fasteners and check that no sharp metal edges are exposed. Apply a small bead of silicone sealant at end caps and corner joints, if your system recommends it, to prevent debris from working its way under the guards.
Step 4: Test Water Flow
Test the entire system with a garden hose. Start at one end and run water along the guards, gradually increasing the flow to simulate heavy rain. Watch for proper drainage into gutters, check that water doesn’t overflow at seams or corners, and confirm that guards remain in place even under water pressure.
Pay special attention to corners and areas near downspouts where problems are most likely to occur. If you notice overflow, the gutter guard may be positioned at too steep an angle, or the gutter pitch may need adjustment.
on LeafFilter®
Mistakes to Avoid When Installing Gutter Guards
Gutter guard installation requires a dozen small decisions that can have a big impact on your results.
Rushing through preparation, using incompatible materials, or overlooking structural issues might save you time upfront, but these shortcuts can lead to water damage or having to redo the entire job down the road. Understanding the most common mistakes homeowners make, from poor panel alignment and improper fastener selection to inadequate safety measures and skipped inspections, can help you avoid frustration and costly repairs.
Below, we’ll go over some common mistakes to look out for so you can be prepared to complete the job correctly.
- Not cleaning out gutters before installation: Debris left inside the gutters can obstruct water flow and defeat the gutter guards’ purpose, leading to potential water damage and increased maintenance needs.
- Incorrect measurements: Accurate measurements are essential for a successful installation. Inaccurate measurements can result in gaps or ill-fitting gutter guards that fail to protect your gutters effectively.
- Choosing cheap quality material: While opting for low-quality materials may save money initially, they can lead to more frequent replacements and repairs. High-quality gutter guards are more durable and provide better protection, ultimately offering better value for your investment.
- Neglecting safety measures: Failing to use proper equipment or not having a spotter can result in accidents or injuries. Always follow safety guidelines, use appropriate tools, and ensure stable ladder placement to prevent falls.
- Improper panel overlap: Failing to overlap guard sections by at least 1 inch can create gaps for leaves and debris to slip through. Overlap panels in the direction of water flow (the upstream panel should sit on top of the downstream panel) and secure with a fastener to prevent separation.
- Damaging shingles: Lifting shingles to slide guards underneath can crack the shingles, break the sealant bond, or create entry points for water. Only slide guards under shingles if your product manufacturer requires it.
- Incorrect fasteners: Use the fastener type, length, and spacing specified by your guard manufacturer. Fasteners that are too long can puncture through the gutter bottom and create leaks, while fasteners made from the wrong material may rust out and fail within a year or two.
- Insufficient pitch: Check and correct gutter pitch before installing guards, ensuring that there is a quarter-inch drop per 10 feet. Installing guards on gutters that don’t slope properly toward downspouts can cause water to pool and overflow.
- Skipping fascia inspection: Mounting guards to gutters that are attached to rotted or damaged fascia boards can lead to system failure. The added weight of gutter guards can cause the entire gutter to pull away from the house.
Gutter Guard Installation Troubleshooting Tips
- Corner seams leaking or separating: The guard sections may not be overlapping properly, or the joint isn’t sealed. Remove the guards at the corner, recut if necessary to ensure a tighter fit, overlap by at least 1 inch, and apply a bead of silicone sealant along the seam before refastening. Make sure fasteners are placed within 2 inches of the corner joint to prevent separation.
- End-cap seals allowing debris entry: Gaps between the guard and end caps can create entry points for leaves. Trim the guard to fit flush against the end cap, leaving no more than ⅛ inch gap for expansion. Apply gutter sealant around the perimeter where the guard meets the end cap, and add an extra fastener near the edge to hold everything tight.
- Valley diverter misalignment causing overflow: Water shooting over guards in roof valleys can indicate that the diverter isn’t positioned correctly or the guard angle is too steep. Adjust the guard so it sits slightly lower in the valley area to catch the concentrated water flow, or install a valley splash guard that redirects water into the gutter.
- Under-shingle conflicts creating gaps or roof damage: If the back edge of your guard won’t fit properly under shingles or is lifting them, you may be forcing it at the wrong angle. Check whether your specific product is designed to go under shingles or simply rest against them. If shingles are damaged or too brittle, switch to a gutter guard system that doesn’t require under-shingle installation.
DIY Gutter Guard Install vs Hiring a Pro
Installing gutter guards yourself can save money upfront since you avoid labor costs and only pay for materials. DIY materials are widely available and range from basic screens to more advanced micro-mesh kits you can cut and snap into place.
However, DIY can require additional tools, ladder work, and enough patience to install hundreds of feet of gutter guards. Mistakes can lead to leaks, improper water flow, or entire system failure, requiring new gutters. Professional installation adds cost upfront but brings expertise, faster project completion, and it is often backed by a warranty — something DIY installations do not include.
Professionals can install a full home system in a few hours to a day, depending on the roof complexity. Meanwhile, a DIYer can spend multiple weekends on the same project, especially on homes with multiple stories or complex rooflines.
Ladder work and overhead installation can carry safety risks. Taking on a DIY installation can cause complications due to a lack of experience working up high, dealing with steep roof sections, and complex gutter runs. Some high-performance micromesh guards require precise installation to ensure proper performance. In those cases, professional installation can lead to better long-term performance and investment.
DIY Gutter Guard Installation
Pros:
- Cost savings: Installing gutter guards yourself can save money upfront since you won’t have to pay for professional labor.
- Flexibility: You can work on your own schedule and pace to manage your time as needed.
Cons:
- Safety risks: Climbing ladders and working at heights pose significant safety risks.
- Equipment needs: DIY installation requires specific tools such as a stand-alone ladder, bucket with S-hook, tin snips or aviation snips (for metal guards), utility knife (for foam or plastic guards), and safety glasses. Ensuring you have all the necessary equipment is essential.
- Skill and expertise: Successfully installing gutter guards requires a good understanding of home repair skills. Mistakes can lead to improper installation, potential damage to gutters or the roof, and ineffective gutter protection.
Professional Gutter Guard Installation
Pros:
- Safety: Professionals are trained and equipped to handle installations safely, significantly reducing the risk of accidents or injuries.
- Efficiency and quality: With their expertise, professionals can ensure that the gutter guards are installed correctly and efficiently. Placing them at the correct pitch provides optimal performance.
- Warranty and support: Many professional services offer warranties on their work, giving you peace of mind and better protection against future issues.
Cons:
- Cost: Hiring a professional can be more expensive than doing it yourself, as you will need to pay for labor and potentially higher-quality materials. However, it can offer cost savings in the long run.
While DIY installation can be cost-effective and rewarding, hiring a professional installer ensures safety, quality, and peace of mind. Assess your comfort level with the required skills and risks, and consider consulting a professional for the safest and most reliable results.
Benefits of Installing Gutter Guards
Gutter guards can help reduce maintenance and the need for frequent gutter cleaning, and protect your home. By blocking leaves, twigs, and other debris from entering your gutters, they can help prevent clogs that cause water to overflow and damage your fascia, soffits, siding, and foundation. This can also help protect your basement from flooding and prevent soil erosion around your foundation that can lead to costly structural repairs.
When it comes to pest problems, gutter guards can keep birds, squirrels, and insects from nesting in your gutters and help stop issues that come with animal activity. For houses surrounded by trees, quality gutter guards can be a worthwhile home improvement that prevents costly repairs.
Help Protect Your Home with Clog-Free Gutters
Whether you choose to install gutter guards yourself or you hire professionals, the goal is the same: keeping your gutters flowing and your home protected from water damage. DIY installation can work well for single-story homes, but many homeowners find that the time requirements, safety concerns, and lack of warranty coverage make professional installation worth the investment.
Systems like LeafFilter’s surgical-grade stainless steel micromesh are installed by local trusted professionals, with custom fitting that accounts for your roof pitch, gutter style, and the debris challenges in your area, plus comprehensive warranty coverage that protects you long-term.
If you’re tired of cleaning out gutters multiple times a year or concerned about doing ladder work, requesting a free estimate helps you understand your options and compare the real costs between DIY materials and a professionally installed system designed to deliver clog-free gutters, guaranteed.
Frequently Asked Questions
Can I install LeafFilter gutter guards myself?
LeafFilter gutter guards are designed for professional installation to ensure proper performance. Installing our stainless steel micromesh filters requires precise leveling, secure fastening, and careful alignment so water flows into the gutter without overshooting. A homeowner with strong carpentry skills might understand the concepts, but the work still involves a ladder, careful measurements, and handling stainless steel micro-mesh panels.
If your home has more than one story, steep roof sections, or damaged gutters, professional installation can be the best option over a DIY project. A trained crew will install the system quickly, reduce risk, and ensure the guards perform as intended. Trained professionals also inspect for any problem areas in the gutters, repair and replace any part of the gutters before installing the LeafFilter gutter guards for the best performance.
This also preserves eligibility for LeafFilter’s lifetime transferable warranty, which depends on proper professional installation for the product to function as designed.
What do roofers say about gutter guards?
Roofers generally recommend gutter guards as they help prevent debris buildup and reduce the need for frequent cleaning. However, they emphasize choosing high-quality gutter guards and ensuring proper installation to avoid issues like water damage or gutter misalignment.
What are the disadvantages of gutter guards?
While gutter guards minimize maintenance by keeping debris out, they are not entirely maintenance-free. Some disadvantages include the initial cost, the need for occasional cleaning, and potential installation challenges. In some cases, smaller debris may still enter, requiring periodic inspection and cleaning.
What is the expected lifespan of gutter guards after installation?
The expected lifespan of gutter guards varies by material and quality. High-quality stainless steel or aluminum guards can last 20 years or more, while less durable options like plastic or foam may need replacement every few years. Proper installation and regular maintenance can extend their lifespan.
How do I maintain micromesh guards?
Micromesh gutter guards need minimal upkeep, but a quick inspection keeps them working well. Check them once or twice a year, especially after fall leaf drop or heavy pollen season. It takes only a few minutes to look for debris resting on top of the mesh.
To clean them out, you can use a soft brush or a gloved hand to remove leaves and twigs. Avoid pressure washers because they can force water under shingles or bend the mesh. Check gutters after severe storms, and confirm that sealant lines around end caps or seams remain intact.
Will LeafFilter gutter guards work on every gutter type?
LeafFilter gutter guards fit most standard residential gutters, including K-style, half-round, and common aluminum, steel, or copper systems. Many homes with traditional 5-inch or 6-inch gutters have no compatibility issues at all.
Homes with unusual gutter profiles, older custom-built systems, or extensive damage may need a professional assessment to confirm compatibility. A trained installer can determine whether gutter replacement or a custom adjustment is required before the guard system is installed.
What warranty does LeafFilter offer?
LeafFilter includes a clog-free gutters guarantee policy backed by a lifetime transferable warranty. This coverage is tied to installation and is designed to help ensure long-term, reliable performance through every season. This warranty allows the protection to remain in place even when the property changes ownership.
The guarantee focuses on helping maintain clear water flow and prevent clogs from common debris such as leaves and twigs, and provides remedies if the system does not perform as intended, as long as it was professionally and properly installed.