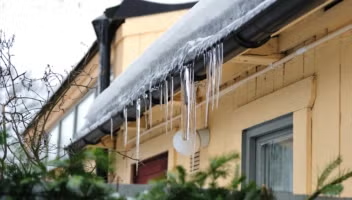
Rain gutters and downspouts play a key role in protecting a home by collecting roof runoff and directing water away from the foundation. Properly installed gutters help reduce the risk of foundation damage, basement flooding, siding deterioration, and landscape erosion.
This guide walks through the basic rain gutter installation process so you can understand what’s involved—and decide whether DIY or professional installation makes sense for your home. While this guide is written for DIY-capable homeowners, professional installation may still be the safer choice for multi-story homes or complex rooflines.
In this article:
- Why Rain Gutters Matter
- Tools & Materials You May Need
- How to Install Rain Gutters: A Step-by-Step Guide
- Common DIY Mistakes To Avoid
- DIY vs Professional Gutter Installation
- Protecting Your Rain Gutters After Installation
- Frequently Asked Questions
Why Rain Gutters Matter
Homeowners rely on rain gutters to protect their homes both inside and out. These systems do more than just collect and move water. They also:
- Directing water away from the foundation to reduce cracking and structural stress
- Protecting siding, fascia, and rooflines from rot and staining
- Reducing soil erosion and landscape damage
- Lowering the risk of basement or crawl space moisture
- Preventing water from pooling near walkways and driveways
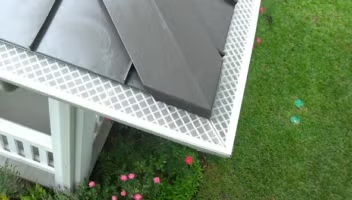
Tools & Materials You May Need
Tools Needed:
- Cordless Drill
- Crimper
- Extension Ladder
- Tin snips or hacksaw
- Tape measure
- Chalk line or bevel
- Caulk gun
- Safety gear (such as gloves and eye protection)
Materials:
- Gutter sections (5” or 6”)
- Downspouts and elbows
- Gutter Flashing
- Gutter Sealant
- Gutter hanging strap
- Rivets
- Self-tapping hex head screws
- Hex head screws (“zippers”)
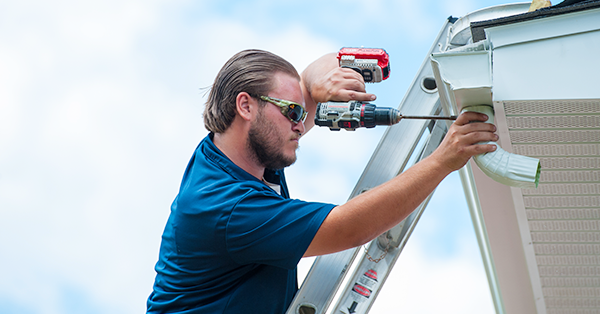
How to Install Rain Gutters: A Step-by-Step Guide
Step 1. Plan & Measure
- Inspect the fascia and soffit for rot or damage. Handle any fascia or soffit repair or replacement before installing gutters.
- Measure the length of each gutter run and mark planned downspout locations.
- Count inside and outside corners and end caps.
- Measure downspout height and add approximately 4 feet for downspout extensions that carry water away from the foundation.
- Plan gutter slope: aim for a 1/4” drop for every 10 feet of gutter run.
Step 2. Snap Layout Lines
- Mark the highest point of the gutter run on the fascia about 1¼ inches below the drip edge flashing.
- At the other end of the gutter run, mark the lowest point. This slope allows gravity-assisted drainage and helps prevent clogged gutters.
- Snap a chalk line between the two points to guide gutter placement.
Step 3. Attach Hangers/Brackets
- Mark hanger locations starting about 4 inches from each end of the run.
- Place hangers every 18–24 inches along the fascia for proper support.
- Install the hangers directly into the fascia or rafter tails to distribute weight evenly and prevent having to fix sagging gutters later.
Step 4. Cut and Prepare Gutter Sections
- Use a hacksaw or tin snips to cut the gutter sections to length. Smooth sharp edges with a file to prevent injury and improve fit.
- Cut downspout outlet holes in the appropriate gutter sections before installation.
- Plan for one downspout every 30–40 feet and at each roof corner.
- To join gutter sections together, cut a 2-inch-long notch on the front lip of the gutter with the tin snips.
- Then, cut a 4-inch-long notch to overlap and then splice together the gutter sections.
- Apply gutter sealant at joints and corners before snapping sections together.
Use gutter sealant along the corner. Hook the front lip of the corner over the notched section of the gutter and snap it over the gutter.
on LeafFilter®
Step 5. Attach Gutters
- Use the chalk line as a reference to maintain proper slope.
- Hook gutters into the attached brackets and secure with screws.
- Double-check spacing, slope, and alignment before moving on.
Step 6. Install End Caps & Seal Joints
- Attach gutter end caps and secure them with screws.
- Apply sealant to seams, end caps, and fastener points to prevent leaks.
Step 7. Attach Downspouts
- Use elbows to keep downspouts close to the siding.
- Secure downspouts with straps or clips every 10 feet for optimal support.
- Install another elbow at the end of the downspout.
- Install gutter tubes at the end of the downspouts to further divert water away from the home to protect the foundation.
Step 8. Test Water Flow
- Run water through the system using a hose.
- Check if the water flows into the downspouts without pooling or leaking.
- Adjust the slope or reseal joints as needed.
Common DIY Mistakes to Avoid
Homeowners who want to DIY their gutter system should be aware of the most common gutter installation mistakes. Incorrect installation can prevent proper drainage and lead to water damage if not addressed early. Common issues include:
- Incorrect pitch, which prevents water from flowing properly
- Too few downspouts, causing overflow during heavy rain
- Improper fastening that allows gutters to pull away from the fascia
- Skipping fascia repairs which can lead to loose or sagging gutters.
- Using undersized gutters that cannot handle roof runoff.
- Poor sealing or too many seams which can lead to leaks in the system.
DIY vs Professional Gutter Installation
DIY installation may be reasonable for single-story homes with straight gutter runs and safe ladder access. However, multi-story homes, steep roof pitches, and complex rooflines increase safety risks and installation difficulty.
Professional installers are equipped to manage ladder safety, precise slope calculations, and proper alignment across varying roof heights. In these cases, hiring a professional helps reduce installation errors and long-term maintenance issues.
Protecting Your Rain Gutters After Installation
After installation, routine inspection and maintenance help keep gutters functioning properly. Gutter guards can reduce debris buildup and lower ongoing cleaning needs. LeafFilter’s professionally installed system comes with a clog-free guarantee and a lifetime warranty.
Frequently Asked Questions
What pitch should gutters be installed at?
For ideal water flow, it is best to install gutters with a pitch (or slope) of ¼ inch per 10 feet of gutter length. This slope allows the water to move freely through the system to avoid pooling or overflow.
Can one person install gutters safely?
Even on single-story homes, having a second person improves safety when working with ladders and long gutter sections. Solo installation increases fall risk and handling difficulty.
How long does installation normally take?
It really depends on the complexity of the project. You may need to remove an old gutter system, cut gutter pieces down to size, install around complicated rooflines, and account for the initial planning. The average timeline can take anywhere from a few hours to a full day for DIY installers, while professionals can finish more quickly due to experience and specialized equipment.